Xamarin iOS Continuous Integration Builds
So you've just picked up Xamarin and you're wanting to use it at home, or in your company to build some kick ass native iOS apps. Well the first step on the road to that is a build server, am I right?
Build servers can be tricky, and when working with a comprehensive platform like Xamarin it can get even more messy. We recently went through the same struggle and it took us far longer than we'd hoped to get a CI system for Xamarin iOS working. Thankfully Android should be fairly similar and very easy to build on.
In this short series I'm going to take you through the process of creating a new Xamarin iOS project with secondary project dependencies and external dependencies such as nuget packages. I'll make use of F# FAKE build scripts and even quickly gloss over using TeamCity to trigger builds from your GitHub or BitBucket repository. I may extend this series with details on Xamarin Android in the future, for now I'll give hints as to how you can extend my examples and let you have the fun.
This is the guide that @tom_glanville, @andrewbeaton, and I wish we had when we started.
Understanding your build process
In this part, we'll be trying to understand how the build process needs to work. To do this we'll be doing a full manual build, this will help us figure out what needs automating and help us to scope out the complexity of it.
Creating a base project to work from
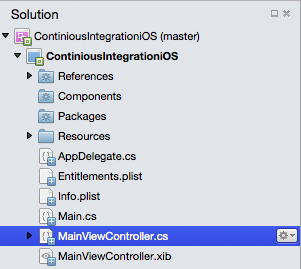
To start with, we're going to create a really basic application. I'm not going to focus on any code at all, that's really up to you and there are plenty of tutorials out there. I've started by opening Xamarin Studio and creating a new iOS and configured my first view controller.

I've added a text box and a button to the storyboard but that's just to enable me to test the builds that are generated.
Once you've got some code to ensure you can test some basic functionality, fire up the simulator. Quickly check it works as you'd expect, this will give us a base line to build from. From now on, we'll be building .ipa files that we can load onto an iPhone.
Certificates and Profiles, what you need to know
Before you go any further, go and read about Apple Certificates and Provisioning Licenses. They're such a pain that I dare not try and explain them here. The important thing to get right is to have the correct certificate and provisioning profile on your machine. You can do this through xcode in the preferences menu at the time of writing this.
The best resource for this is Apple themselves, but it may require a little bit deeper research, there are a lot of stackoverflow topics with great answers.
The way we've done ours currently, is using the development certificate and profile for all of our internal builds, then we use a distribution certificate and profile for sending it to the App Store. This keeps things simple and means our build process will work for both, we just need to configure the project to hunt for different ones in different circumstances.
Configuring your certificates and profiles
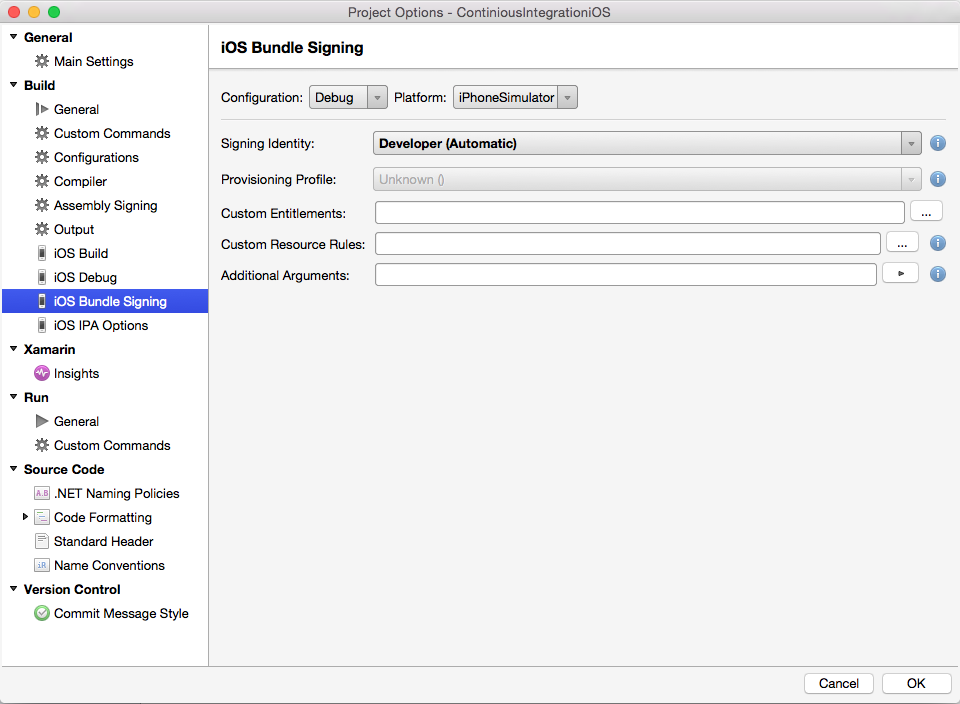
Open up the csproj options window and head to iOS Bundle Signing. You'll get a screen with something like this.

Here we will set which certificates and profiles we wish to use for particular configurations. This means you'll need the development and distribution certs/profiles in your machine... Have fun with that.
We're going to set up the following settings for our project, you're obviously welcome to diverge here but I'd suggest sticking with these until the end, then you'll know what's going wrong when unhelpful error codes pop up.
| Config | Signing Identity | Provisioning Profile | What is this? |
| Debug | Developer (Automatic) | Unknown or Automatic | Breakpoints + simulator use |
| Release | Your dev cert | Your dev profile | We won't really be using this. |
| Ad-Hoc | Your dev cert | Your dev profile | Ad-hoc .ipa's (build server) |
| App Store | Your dist cert | Your dist profile | App Store .ipa releases |
For now, just roll with it. Most of these have been added by Visual Studio for me, if you don't have them then you have two options. First, use Debug with the same settings as above, and Release as distribution, ignoring your development certificate. Or second, add the ones above. You can add the ones above by opening up the .csproj in any ol' text editor and editing the xml. Simply copy and paste the PropertyGroup that starts something like this and rename the Configuration to the ones we have above.
<PropertyGroup Condition=" '$(Configuration)|$(Platform)' == 'Release|iPhone' ">
Once that is done, just re-open the project in Xamarin then head to bundle signing and they'll all be there for you.
Note: Configure them all for iPhone, only Debug really needs to be for the simulator but you're welcome to add in the others for the Simulator as well.
Building an IPA
This is pretty easy so lets just do it.
- Set your current build options to Ad-Hoc and iPhone.
- Go to the "Build" menu and hit
Archive for publishing. - Once a build is complete, the archive page should open. From here, select the latest archive and click the "Sign" button at the bottom right of the screen.
This will produce an IPA that will run on any devices that are authenticated for the particular certificates / profiles you used.
Now we know we can do this manually, the next step is to automate the process.
FAKE and IPA's with Xamarin
In this part, we'll explore a very simple FAKE script which will build our project and IPA, later on we will come back and add to this process.
Creating a shell script to run
Before we start fiddling around with our FAKE scripts, lets make a little shell script which will allow us to easily run it. The following build.sh file will check if a version of FAKE exists, if not then I'll pull it down and then it'll use that to run the build.
#!/bin/bash

if [ ! -f FAKE.4.4.4/tools/FAKE.exe ]
then
    echo "Installing FAKE..."
	mono --runtime=v4.0 tools/NuGet/nuget.exe install FAKE -Version 4.4.4
fi

echo "Running build..."
mono --runtime=v4.0 FAKE.4.4.4/tools/FAKE.exe build.fsx
It's important to note that this requires that inside our repository, we have "nuget.exe", that seems peculiar doesn't it? There are more elegant ways of approaching this and we'll explore that in the last part, but for now we're going to be looking at the fastest way of getting this going for now.
The first FAKE script
Now it's time to kick start our FAKE scripts, I'd highly recommend following through their tutorials to begin with. It's important to understand roughly how FAKE works before diving into writing your own scripts.
Here's the script we'll be starting with, it contains just enough to create us an ad-hoc IPA, if your certificates and profiles are set up correctly, this should run like a dream!
#r @"FAKE.4.4.4/tools/FakeLib.dll"

open Fake
open System

let packagingRoot = "./packaging/"

Target "clean" (fun () ->
    CleanDirs [packagingRoot]
)

Target "restorePackages" (fun () ->
    // Recursively restore nuget packages
    RestorePackages()
)

Target "iosBuildAdHoc" (fun () ->
    // Build the ad-hoc IPA
    XamarinHelper.iOSBuild (fun defaults ->
        {defaults with
            ProjectPath = "ContiniousIntegrationiOS/ContiniousIntegrationiOS.csproj"
            Configuration = "Ad-Hoc"
            Platform = "iPhone"
            OutputPath = packagingRoot
            BuildIpa = true
            Target = "Build"
        })
)

// Configure dependencies
"clean"
    ==> "restorePackages"
    ==> "iosBuildAdHoc"

RunTargetOrDefault "iosBuildAdHoc"
Put both of those into root if your project and we should be ready to test it.
Running a build
We've made it really easy for ourselves to run a build now. The single command you'll need to run (in the root if your project directory) is now:
./build.sh
Wait for the magic to happen, it does take a while but your IPA should be avalible inside the /packaging directory.
That's it, really simple right! There are a number of things you need to be aware of when putting this onto an automated build server such as TeamCity or Jenkins, we'll get onto that in a later part.
Member discussion